Pour concrete in the designated area and finish to a smooth texture.
Maintain a slump range of 4–7 to ensure a successful installation.
Step 2
Position the initial detectable warning plates in the project-specified location.
Align the plates according to the curb line and ramp boundaries.
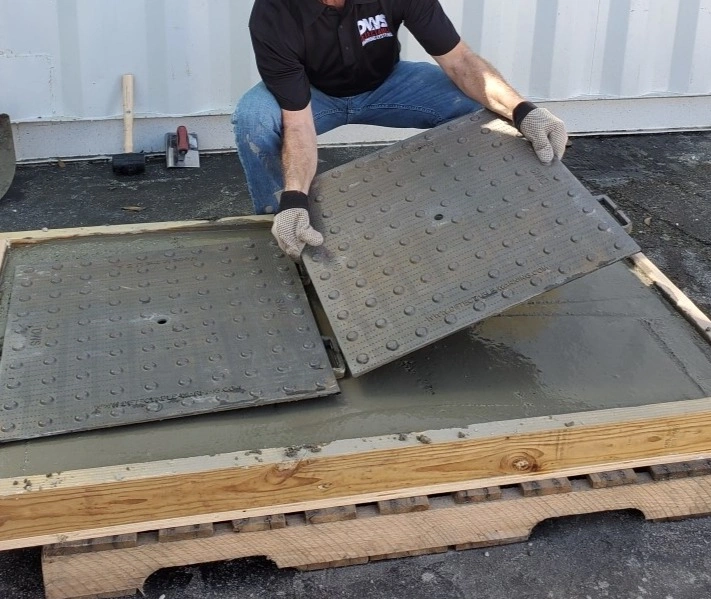
Step 3
Ensure the side with the two extended arches faces the direction of the next plate.
Connect the adjacent plate by aligning its two tabs with the arches of the previous plate.
Step 4
Avoid fully embedding the first plate before the next is in position.
Insert the tabs of the second plate into the arches of the first to engage the interlocking system.
Use this connection to ensure correct alignment between all adjacent panels.
Step 5
Continue this process until all plates have been set onto the wet concrete.
Step 6
Tap the plates with a rubber mallet until they are fully embedded and level with the concrete surface.
Ensure all air trapped beneath the plates is evacuated through the integrated air vents on the top.
Step 7
Tap the plates with a rubber mallet until they are fully embedded and level with the concrete surface.
Monitor the integrated air vents on the top to ensure all trapped air is evacuated during the process.
Step 8
Protect installed plates from any foot traffic until concrete is cured.
Cast Iron Install Questions?
We’re ready when you are. Whether you need a single sidewalk install or full transit platform support. Specs, layout help, or a quote are just one click away.